I keep a small, predictable pantry not because I’m fancy, but because I need dinner (and lunch) to work on busy days. One of my favorite lifelines is a humble can of beans. Paired with a few pantry staples, that single can can become three different, kid-approved lunches in under 20 minutes. Below I’ll walk you through the exact pantry mix I always keep on hand, three fast recipes you can rotate through the week, quick pack-and-go tips, and simple swaps for picky eaters or dietary needs.
The pantry mix (everything you need)
This is the minimal, flexible pantry I rely on. It’s not fancy — just ingredients that play well with beans and are kid-friendly.
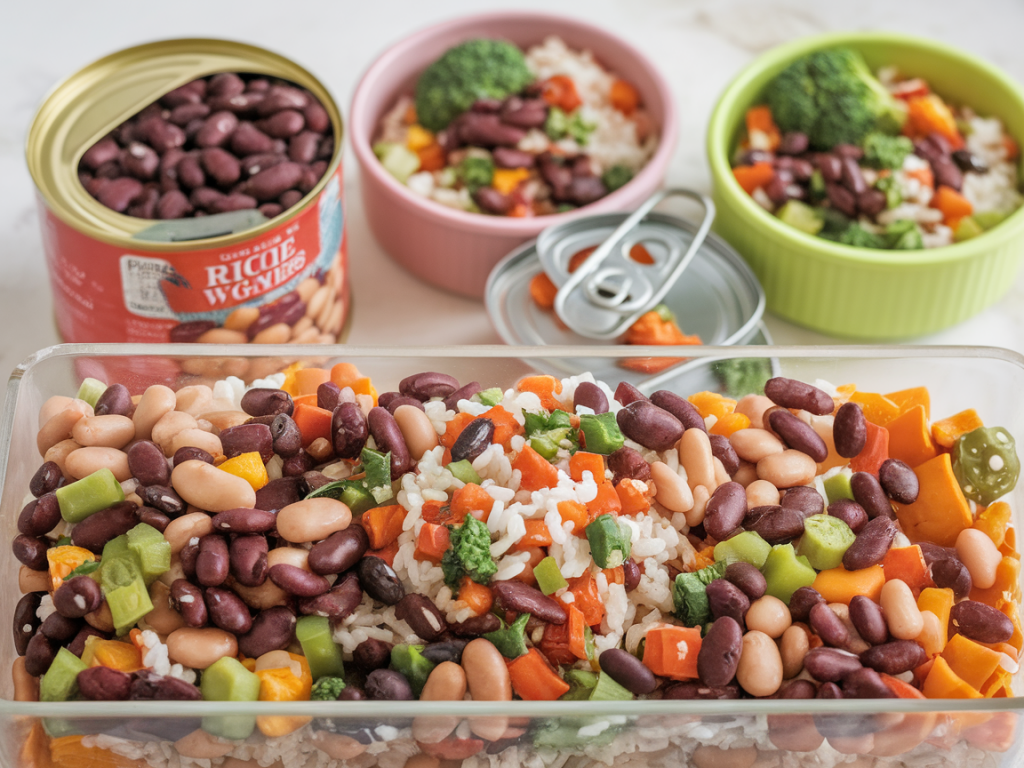
- 1 can of beans (any: black beans, chickpeas, cannellini, navy — I use what’s on sale)
- Tortillas (flour or corn, small taco-sized work best for kids)
- Jarred salsa (mild or medium depending on the kids)
- Shredded cheese (cheddar, mozzarella, or a Mexican blend)
- Mayonnaise or Greek yogurt (for quick creamy dressings)
- Olive oil or neutral oil
- Vinegar (apple cider or white wine)
- Mustard (Dijon or yellow — great for flavor without heat)
- Honey or maple syrup (adds balance for kids)
- Breadcrumbs or crushed crackers (for texture if frying or baking patties)
- Frozen corn (thawed quickly in a bowl of warm water)
- Pickles or jarred roasted peppers (optional, for interest)
- Basic spices: salt, black pepper, garlic powder, smoked paprika
How I prep a can of beans in 2 minutes
Before any recipe, I do the same quick prep. It makes the rest go fast and keeps flavors consistent.
- Open and drain the can. If the beans are particularly salty, give them a quick rinse.
- Place the beans in a bowl and mash roughly with a fork or potato masher. I like a slightly chunky texture kids can recognize.
- Toss in a splash of olive oil, a pinch of salt, a pinch of garlic powder, and a little smoked paprika if you have it. This is your neutral base.
Lunch 1 — Kid-friendly bean quesadilla (5–7 minutes)
Why kids love it: melty cheese and familiar tortilla shape. Why parents love it: minimal hands-on time and easily packed.
Ingredients (per quesadilla):
- 1 small tortilla
- 1/3 cup prepared bean mash
- 1/4 cup shredded cheese
- 1–2 tbsp mild salsa or plain yogurt on the side
Method:
- Heat a nonstick pan over medium. Place tortilla in pan, spread bean mash over half, sprinkle cheese, and fold.
- Cook 2–3 minutes per side until golden and cheese is melted. Cut into wedges for little hands.
Pack tip: Wrap in foil to keep warm or add a small container of salsa for dipping. Add cucumber sticks or apple slices to round out the meal.
Lunch 2 — Bean “tuna” salad sandwich (5 minutes)
Why kids like it: familiar sandwich texture and mild, creamy flavor. This is a great vegetarian swap for tuna salad.
Ingredients (for 1 sandwich):
- 1 cup roughly mashed beans
- 2 tbsp mayo or Greek yogurt
- 1 tsp mustard
- 1 tbsp sweet pickle relish or chopped dill pickle (optional)
- Salt and pepper to taste
- 2 slices bread or a roll
Method:
- Mix beans with mayo/yogurt, mustard, and relish. Taste and adjust salt/pepper.
- Spoon between bread. Add lettuce or thin apple slices if your kid likes crunch.
Pack tip: Separate the sandwich and the chips/crisps to keep bread from getting soggy. Add carrot sticks and a small fruit cup.
Lunch 3 — Bean & corn mini bowls (ready in 6–8 minutes)
Why kids like it: colorful, spoonable, and customizable. It’s also great in a thermos for warm lunches.
Ingredients (single bowl):
- 1 cup prepared bean mash
- 1/4 cup thawed frozen corn
- 2 tbsp shredded cheese
- 1 tbsp salsa or a drizzle of olive oil with a squeeze of lemon
- Optional: small handful of tortilla chips for crunch
Method:
- Warm the beans and corn together in a microwave-safe bowl for 45–60 seconds, or heat briefly on the stovetop.
- Stir in cheese so it melts slightly, top with salsa or lemon oil, and serve with chips on the side.
Pack tip: If packing cold, keep the chips in a separate small bag. Add a small container of plain yogurt with honey as a dessert/treat.
Quick swaps for picky eaters and allergies
I always have to tweak for kids who don’t like texture or have allergies. These swaps keep the lunches working without much extra time:
- If dairy is an issue, use dairy-free cheese or skip it and add a spoonful of hummus for creaminess.
- For nut allergies, avoid pesto/toppings that contain nuts and use seeds (sunflower) if you want crunch.
- If the child hates whole beans, blitz the mash smoother in a blender or food processor — it becomes almost hummus-like.
- Spice-sensitive kids? Stick to smoked paprika and a tiny pinch of garlic powder instead of chili powders.
- Short on tortillas? Use pita pockets, crackers, or simply toss the bean mix with pasta for a bean pasta salad.
Make it ahead and store
I often make a double batch of the basic bean mash and keep it in the fridge for up to 4 days. Here’s how I store and use it:
- Store in an airtight container. Label with the date.
- To reheat for thermos lunches: warm in the microwave until steaming, then transfer.
- Leftovers: stir into soups, spoon over baked potatoes, or toss with sautéed greens for a quick dinner.
Timing and efficiency tips
- Open and mash beans while the kettle is heating or while slicing fruit — little moments add up.
- Keep one container of shredded cheese and a jar of mild salsa in the fridge at all times. They’re the easiest flavor boosters.
- If you have a toaster oven, quesadillas or small bean patties can cook hands-off while you pack sides.
- Make a “lunch station” in the fridge: individual containers of cut fruit, prepped veggies, and a bag of crackers so assembly is quick.
These three lunches are the ones I reach for again and again because they’re fast, reliable, and forgiving. A single can of beans becomes a quesadilla, a sandwich filling, and a hearty bowl — each one adaptable to what my kids are actually eating that day. Keep the pantry small, the prep predictable, and you’ll have kid-friendly lunches that don’t require a second mortgage or a culinary degree to pull off.